Blog

  • Email Doesn’t Scale

    I’ve been wanting to write about my problems with email for a while now, but keep coming up short when it comes to explaining exactly why it fails for me. That is, until reading Tantek’s latest on the subject:

    “I’m probably responding to less than 1 in 10 emails that are sent directly to me, even fewer of those that are sent to a set of people or a list. The usability of email for me has deteriorated so much that I exclaimed on Twitter recently: EMAIL shall henceforth be known as EFAIL.”

    He goes on to explain his thoughts on why point to point communications do not scale, and how emails in general are becoming too bloated (the lack of a singular focus in many emails I receive definitely impacts my likelihood of responding), as well as how 1:many or 1:all mediums are superior to 1:1 methods (e.g. email). This is exactly what I’ve been trying to figure out how to say.

    Semi-solutions

    Tantek certainly isn’t the first to write about the the problems with email – Mike Davidson’s solution last year was to reduce the length and detail of replies to a specific number of sentences, but that hasn’t allowed me to make a sufficient dent in my inbox.

    Similarly, Inbox Zero (a process many of my friends use to keep the noise down) just doesn’t seem to work for me. Plus, having an empty inbox won’t stop people from communicating with me via email when they should be using another medium.

    It’s not you, it’s me

    Both Inbox Zero and Sentenc.es aim to reduce the impact of the full inbox by making it easier to empty on a regular basis, but for me that doesn’t solve the problem as I see it–it isn’t a matter of finding a way to work around what email has become, it’s just that email is being used improperly, and I’d rather use other methods of communication that are more appropriate to the type and relevance of the message.

    How do we fix it?

    Email isn’t broken for everyone (or at least, if it is they don’t realize it yet), but I find more people becoming frustrated with email every week. Add the whole SPAM problem into the mix (over the last 6 months, more and more of my valid incoming/outgoing messages are getting caught by SPAM filters than ever) and I just see email continuing its downward spiral.

    I’m not sure of the solution – as long as my clients continue to send me emails and expect a response, I’m a bit nervous to tell them to shove it (it’s hard enough to get them to all use Basecamp instead for project communication, let alone stop using a method that still works for them), but perhaps that’s what it will come down to. Tantek’s article ends with a list of suggestions that can serve as a decent starting point, and his Email Reduction project is also worth checking out.

    Does email = efail for you? How do you feel about the future of email?

  • Pink for October

    As you may have noticed (if you’re viewing this site in a standard browser), I’ve ditched orange in favor of pink, and things will stay that way for the rest of October. I’m doing this, along with many other sites, to support Breast Cancer Awareness Month.

    For more information on this project (created by Matthew Oliphant), check out the Pink for October site.

  • Sidebar Creative Interviewed by Digital Web

    Matthew Pennell of Digital Web Magazine recently sat down with the boys from Sidebar Creative for a group chat about our little design collective.

    We talk about what goes on behind the scenes, our approach to creating web apps (including our first venture, MyMileMarker), and our plans for the future.

    Working with Sidebar has been a wonderful experience since we started in January, and this interview offers you a glimpse of our personalities and some insight into why it works.

  • Customize your iPhone: SummerBoard

    Update: SummerBoard 2.1+ makes much of this tutorial inaccurate, but the theme instructions still work. I’ll be writing an updated tutorial shortly to reflect the changes and additions.

    Note: Before following this tutorial, make sure you have everything you need »

    The first tutorial in this series covered using DockSwap to change your iPhone’s Dock background, specifically replacing it with one that matches the Dock on the iPod Touch:

    customized iPhone Dock

    This was fine and dandy until yesterday, when a new version of SummerBoard (an app which allows customization of the iPhone’s SpringBoard, or home screen) was released. This new version supports themes and various other settings, but most importantly it appears to prevent DockSwap from doing its job. Thankfully, we can now take advantage of SummerBoard’s new theme support to set a custom Dock background, home screen wallpaper, or both.

    Summer lovin’

    First thing’s first: fire up Installer.app on your iPhone and install SummerBoard (the current version as of this writing is 2.0). If you already have DockSwap installed, there’s no reason to uninstall it; it just doesn’t affect any change when you use it. However, if you’d like to save some space, you can go ahead and remove it.

    SummerBoard 2.0 offers the following home screen (aka SpringBoard) customization goodness:

    • Scrolling application icons
    • Scroll Snap (for each row of icons)
    • Wallpaper under home screen icons
    • Themes (Dock and wallpaper images)
    • Mini Dock (which does exactly what it says)

    In addition to those main features, there are extra settings which give you additional control over your home screen:

    SummerBoard preferences

    There isn’t much need to describe in detail what each of these settings does, plus it’s much more fun if you just play around with them and see for yourself.

    Simple themes

    SummerBoard 2.0 includes four themes by default:

    • Default (aka how your iPhone shipped)
    • Leopard
    • Panther
    • SummerBoard

    Each theme is comprised of three images (pixel dimensions follow each file name):

    • Dock.png (320×91)
    • MiniDock.png (320×37)
    • Wallpaper.png (320×480)

    Creating your own custom theme is simply a matter of creating each of those images, placing them in a folder and then copying that folder to the proper location on your iPhone.

    Adding a custom theme

    There’s really no end to the number of custom themes you can create using an image editor and some free time, so I’ll leave that process to you (after all, this isn’t an image editing tutorial). We will, however, walk through the simple process of transferring a custom theme to your iPhone.

    First, we need a custom theme—for this example, I’ve created a theme based on the iPod Touch home screen, complete with plain black wallpaper (in case don’t want your “lock screen” image showing up behind your icons). For those of you who already followed my earlier tutorial on replacing your Dock background (see the Dock screenshot at the beginning of this tutorial), this will allow you to have the same look with SummerBoard 2.0 installed:

    After decompressing the archive, you will have a folder named “Touch” that contains the required image files.

    Next, connect to your iPhone via SFTP (read the instructions if needed), and navigate into Library/SummerBoard/Themes (the full path is /private/var/root/Library/SummerBoard/Themes), where you’ll see the directories of the four pre-installed themes mentioned earlier. Once there, upload the entire “Touch” folder (its path should be /private/var/root/Library/SummerBoard/Themes/Touch).

    Now return to your iPhone’s home screen (press the “Home” button) and launch SMBPrefs, then press “Theme” and select “Touch” (the theme we just uploaded). Press the “Home” button once more to return to your home screen and see the new theme in place, looking something like this:

    iPhone with SummerBoard Touch theme

    Share your customizations

    If you feel inspired and create a cool theme, upload an archive to your site or other file repository and link to it in the comments of this entry. At some point in the near future, iPhone customization sites will begin to support themes, but until then it’ll be fun to pass them around.

    Even if you prefer to not share your custom images, be a good sport and share any cool customizations with the entire class by posting screenshots of your customizations to Flickr and adding them to the iPhone Customization group.

  • Customize your iPhone: DockSwap

    Update: “DockSwap” is now known as “Customize”. Also, for more theme-like options, you may want to use Summerboard instead »

    Note: Before following this tutorial, make sure you have everything you need »

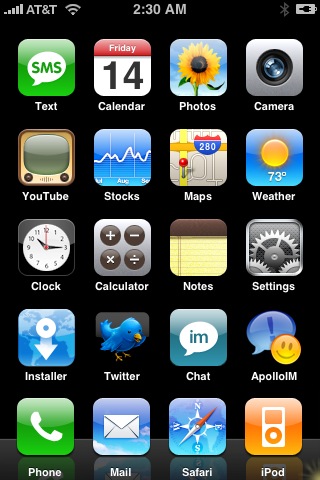
    With the introduction of the iPod Touch, many iPhone owners (myself included) let slip a few quiet “ooohs” and “ahhs” at the more Leopard-esque Dock background behind the 4 main application icons:

    iPod Touch Dock

    Initially, I just resigned myself to the hope that Apple would update the look of the Dock in the next major iPhone Software Update. But then a few days ago, a new application appeared in the Installer.app list: DockSwap, along with some custom Dock background images. Bleeding-edge developers be praised! Of course, I had to install it and make my own custom background, and this tutorial is a result.

    Before and after

    By following the steps below, we’re going to take our iPhone Dock from its default style:

    the default iPhone Dock

    to a shiny new “iPhone Touch” version:

    customized iPhone Dock

    We won’t be replacing the default applications or icons in this tutorial, though I plan to cover launchers and SpringBoard customization in the future.

    Get DockSwap

    Before we dig into the graphics, launch Installer.app on your iPhone, and install DockSwap. There are also some custom background images for DockSwap, so go ahead and install them if you want to play around with some alternate options.

    Do not touch?

    When I started writing this tutorial, the default package of custom Dock backgrounds did not include any iPod Touch versions, however this has since been remedied. For those of you who don’t want to create a custom version (e.g. changing the background color to something other than black) or haven’t customized the four default iPhone application icons (Phone, Mail, Safari, iPod), you can just install the custom images and use one of the included iPod Touch background images—however, as of this writing, I still prefer my version since it is closer to the real iPod Touch background.

    The template

    To make it as easy as possible to customize the dock image, I’ve created a simple, layered Photoshop file that includes the default set of icons, a customizable background color layer, and the other elements in separate layers in case you want to play around on your own:

    If you don’t have Photoshop, I’ve also created two PNGs, one with reflections and one without:

    You can just use these as-is, or edit them using your non-Photoshop image editor of choice.

    Your custom background

    If you don’t plan to make any customizations, and just want the iPod Touch look, you can just download one of the PNGs above and skip to the next section. Otherwise, read on.

    The PSD includes a text layer with reminder instructions, so make sure you hide that before exporting your image.

    You can easily change the background color of the dock by double-clicking the bottom layer in the layer group (named “bg color“). Some colors will work better than others, so play around until you get the desired result. Darker colors will work better:

    alternate Dock background colors

    Of course, there’s no limit to what you can do visually, but I’ll leave further explorations to you.

    Once you have your background image the way you want it, just save it as a PNG (via Save As… or as a 24-bit PNG using the web export option).

    Upload and apply

    Now that you have your custom background image(s), it’s time to get them on your iPhone, and the easiest way is via SFTP. If you followed the instructions, you will be able to connect directly to your iPhone via its IP address (your iPhone must be connected to a WiFi network for this to work). To find your iPhone’s IP address, tap Settings→Wi-Fi, then the blue arrow next to the name of the network to which you are connected.

    Connect to that IP address using your SFTP client, with “root” as the username and “dottie” as the password (to keep the connection alive, you may need to temporarily change your iPhone’s Auto-Lock setting to “Never”, under Settings→General→Auto-Lock, to prevent the iPhone from entering sleep mode).

    Once logged in, navigate into the “Library” directory that appears (the full path to this directory is /private/var/root/Library). Once there, navigate into the “DockSwap” directory (if it doesn’t exist, create it), and then create a new directory named “Custom“.

    Upload your background images into the newly created “Custom” directory, then launch DockSwap on the iPhone and select your new background image. Press your “Home” button to return to the SpringBoard (which automatically restarts), slide the unlock switch, and your Dock should now be graced by your custom background image!

    Share your customizations

    In the grand spirit of sharing, if you create some snazzy new custom Dock background, post it online and link to it in the comments of this entry, and I’ll start creating a collection that can be posted as a package. I may also see about getting such a package added to the Installer.app sources so it can be regularly updated and easily installed on iPhones everywhere.

    Even if you prefer to not share your custom images, go ahead and post screenshots of your customizations to Flickr and add them to the iPhone Customization group.