Category: Uncategorized

  • Customize your iPhone: DockSwap

    Update: “DockSwap” is now known as “Customize”. Also, for more theme-like options, you may want to use Summerboard instead »

    Note: Before following this tutorial, make sure you have everything you need »

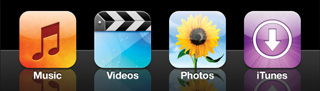
    With the introduction of the iPod Touch, many iPhone owners (myself included) let slip a few quiet “ooohs” and “ahhs” at the more Leopard-esque Dock background behind the 4 main application icons:

    iPod Touch Dock

    Initially, I just resigned myself to the hope that Apple would update the look of the Dock in the next major iPhone Software Update. But then a few days ago, a new application appeared in the Installer.app list: DockSwap, along with some custom Dock background images. Bleeding-edge developers be praised! Of course, I had to install it and make my own custom background, and this tutorial is a result.

    Before and after

    By following the steps below, we’re going to take our iPhone Dock from its default style:

    the default iPhone Dock

    to a shiny new “iPhone Touch” version:

    customized iPhone Dock

    We won’t be replacing the default applications or icons in this tutorial, though I plan to cover launchers and SpringBoard customization in the future.

    Get DockSwap

    Before we dig into the graphics, launch Installer.app on your iPhone, and install DockSwap. There are also some custom background images for DockSwap, so go ahead and install them if you want to play around with some alternate options.

    Do not touch?

    When I started writing this tutorial, the default package of custom Dock backgrounds did not include any iPod Touch versions, however this has since been remedied. For those of you who don’t want to create a custom version (e.g. changing the background color to something other than black) or haven’t customized the four default iPhone application icons (Phone, Mail, Safari, iPod), you can just install the custom images and use one of the included iPod Touch background images—however, as of this writing, I still prefer my version since it is closer to the real iPod Touch background.

    The template

    To make it as easy as possible to customize the dock image, I’ve created a simple, layered Photoshop file that includes the default set of icons, a customizable background color layer, and the other elements in separate layers in case you want to play around on your own:

    If you don’t have Photoshop, I’ve also created two PNGs, one with reflections and one without:

    You can just use these as-is, or edit them using your non-Photoshop image editor of choice.

    Your custom background

    If you don’t plan to make any customizations, and just want the iPod Touch look, you can just download one of the PNGs above and skip to the next section. Otherwise, read on.

    The PSD includes a text layer with reminder instructions, so make sure you hide that before exporting your image.

    You can easily change the background color of the dock by double-clicking the bottom layer in the layer group (named “bg color“). Some colors will work better than others, so play around until you get the desired result. Darker colors will work better:

    alternate Dock background colors

    Of course, there’s no limit to what you can do visually, but I’ll leave further explorations to you.

    Once you have your background image the way you want it, just save it as a PNG (via Save As… or as a 24-bit PNG using the web export option).

    Upload and apply

    Now that you have your custom background image(s), it’s time to get them on your iPhone, and the easiest way is via SFTP. If you followed the instructions, you will be able to connect directly to your iPhone via its IP address (your iPhone must be connected to a WiFi network for this to work). To find your iPhone’s IP address, tap Settings→Wi-Fi, then the blue arrow next to the name of the network to which you are connected.

    Connect to that IP address using your SFTP client, with “root” as the username and “dottie” as the password (to keep the connection alive, you may need to temporarily change your iPhone’s Auto-Lock setting to “Never”, under Settings→General→Auto-Lock, to prevent the iPhone from entering sleep mode).

    Once logged in, navigate into the “Library” directory that appears (the full path to this directory is /private/var/root/Library). Once there, navigate into the “DockSwap” directory (if it doesn’t exist, create it), and then create a new directory named “Custom“.

    Upload your background images into the newly created “Custom” directory, then launch DockSwap on the iPhone and select your new background image. Press your “Home” button to return to the SpringBoard (which automatically restarts), slide the unlock switch, and your Dock should now be graced by your custom background image!

    Share your customizations

    In the grand spirit of sharing, if you create some snazzy new custom Dock background, post it online and link to it in the comments of this entry, and I’ll start creating a collection that can be posted as a package. I may also see about getting such a package added to the Installer.app sources so it can be regularly updated and easily installed on iPhones everywhere.

    Even if you prefer to not share your custom images, go ahead and post screenshots of your customizations to Flickr and add them to the iPhone Customization group.

  • Flickr Old Skool Badges

    Flickr old skool badge examples

    On January 30th, pre-acquisition members of Flickr received an email. For those of you who didn’t receive the message, it looked something like this. The gist of the message was that, on or before March 15th 2007, us “old skool” members would have to roll our original Flickr usernames (our email addresses) into new or existing Yahoo! accounts.

    Stick Wit U

    Now, I’m not going to get involved with the discussion about the merits of this decision, especially since I’m going to have to create a special Yahoo! account just for Flickr (personal preference, yes, but only because I only use my existing Yahoo! account for communication with a few specific offline organizations, and combining them with Flickr just doesn’t make sense), but I thought in the spirit of us old skool members sticking with Flickr for so long, through thick and thin, I’d whip up an easy way to display our “age” (perhaps you’d prefer “steadfastness”?). So, with one month to go until the deadline, here they are: Flickr Old Skool Badges.

    Badges? We Don’t Need No Stinkin’ Badges!

    Each badge is a 48px x 48px transparent PNG, perfect for layering right on top of your existing Flickr profile image. Just right-click on the links below to save each image to your computer.

    No usage restrictions, just credit me and link back here if you alter and redistribute them, and don’t redistribute the original versions (link directly to this entry).

    Old Skool users rawk!

    Updates

    • Thanks to Patrick Haney for suggesting the bottom diagonal variation.
  • And The Nominees Are…

    SXSW Interactive logo

    The finalists for the 2007 SXSW Web Awards have been announced, and I’m humbled that SuperfluousBanter has been nominated in the Blog category (which, somewhat strangely for this site, is described as including “Sites that revolutionize the power of publishing by providing regularly updated content of a personal or professional nature.”—I won’t make a direct comment on the “regularly updated” part, though I’m sure Garrett might agree that I’ve revolutionized the art of getting traffic without posting…), in what seems to have been an incredibly difficult year for the judges to even select finalists.

    I’m up against some tough competition, including a fellow Sidebar Creative founder:

    Now, Twitter may be considered by some to have something of an edge, especially in the “number of authors” category, but it’s definitely revolutionary, and has become a blogging substitute for many people already. The other finalists can definitely hold their own, and frankly I think I peed a little when I read the list ;)

    I’m honored to be in such company, and this may just be the final kick in the pants that I’ve needed to get off my duff and clean this place up—I mean, seriously, it’s like no one’s lived here for ages, and just left without washing the dishes in the sink…

    Finally, don’t forget to cast your vote once a day in the People’s Choice awards. And I mean that: don’t vote for this site unless you actually enjoy it (and if you want to see more content, hint-hint ;) but make sure you vote for your favorite no matter what, every day.

  • Introducing Sidebar Creative

    Today, a new team is born. No, it’s not a new company (per se), but a collective of developers and designers who all share the same goals, run their own consultancies, are active in the web standards community, and want bigger and better things for the web community.

    We are authors, designers, programmers, and thinkers. We love XHTML/CSS, we champion usability while striving for good looks (in our designs ;) and we love branding.

    The list really goes on and on (we get along really well, we’re all musicians, etc.) but the most important thing is that together, we will be able to tackle larger projects than we could on our own (and perhaps more importantly, larger clients may approach us as a group where they might not individually) and have a ton of fun in the process.

    So, who are we? As individuals, you may know the gang as Steve Smith, Jon Snook and Bryan Veloso. You can even listen to us ramble on about it on a brand new episode of Live from the 101. But it’s the sum of the parts that really makes this exciting.

    We are Sidebar Creative, and we’re just getting started.

  • Blogger. Template. Fixed.

    Blogger template questions? Please search and/or post to the official Blogger Help Google Group—you are much more likely to get a response there than by emailing me.

    A little over 2 years ago, Blogger relaunched, and featured all-new templates designed by some of your favorite designers. I was lucky enough to be included in that list, and my template set, Thisaway, was well received and has enjoyed some popularity over the last few years. That is, unless you’re an IE user who happened to put italics in a certain parts of your posts.

    Woe is IE

    IE/Win suffers from a curious bug (gasp!) related to the use of italics in certain situations. The wonderful folks at Position is Everything have documented this as much as possible (or as one would want to), and, as luck would have it, their fix works on Thisaway.

    Why now?

    I’ve been emailing the fix to people for quite a while now, on a case-by-case basis, and it’s also been posted to the Blogger Google Group, but I finally coordinated with the nice folks at Blogger a few months ago to start incorporating the fix into the live templates, so new users of the template would get the fixed version. Happily, I can now say that as of a few weeks ago, the fix is now live, and seems to test out just as it should.

    Fixing existing blogs

    What if you’ve been using one of my Thisaway templates for a while? If you want to update your blog to incorporate the fix, you have two options.

    Option 1: Start from scratch

    If you haven’t made any customizations to the blog template (e.g. adding elements to the sidebar, changing the CSS, adding a custom header image, etc.), you can simply log into your Blogger admin area, select the “Template” tab, then click “Pick new” in the template sub-nav, and select the same Thisaway color scheme you are currently using. Then just republish to update your blog with the fixed version.

    Option 2: Apply the fix manually

    This isn’t as scary as you might think, though it takes a few more steps than Option 1. After logging into your Blogger admin area, click the “Template” tab, and then focus your attention on the text editing area on that page.

    You’re looking for the following CSS in the upper portion of the template code:

    .post-body div {
    font-size: 13px;
    line-height: 18px;
    margin: 10px, 0px;
    }
    

    Change that to match the following:

    .post-body div {
    font-size:13px;
    line-height:18px;
    margin:0;
    height:1%;
    overflow:visible;
    }
    

    The last line of the original is changed, and two additional lines have been added.

    Click “Save Template Changes” and then republish to update your blog.